![The Ultimate Guide to Skyline Keys: How to Download & Install Prod.keys & Title.keys [Android]](https://getprodkeys.com/wp-content/uploads/2025/04/skyline-keys-958x539.jpg)
If you’re an Android gamer looking to play Nintendo Switch games on your phone, the Skyline Emulator is one of the best ways to do it.
But before you can start playing, you need two crucial files: prod.keys and title.keys.
In this ultimate guide, I’ll walk you through everything you need to know about Skyline Emulator, where to get the necessary keys, and how to install them step-by-step—even if you’re a complete beginner.
Table of Contents
What is the Skyline Emulator?
Skyline is a free, open-source Nintendo Switch emulator designed specifically for ARMv8 Android devices.
That means it works on most modern smartphones and tablets, letting you play Switch games without needing the actual console.

Why Use Skyline?
- Open-source – No shady business, completely transparent development.
- High compatibility – Supports many popular Switch games.
- Active development – Regular updates with performance improvements.
- No root required – Works on most Android devices without needing special permissions.
However, not all Switch games work perfectly yet, so check the Skyline Compatibility List before diving in.
What Are Prod.keys & Title.keys?
To run Switch games on Skyline, you need two essential files:
- prod.keys – These are system encryption keys that allow the emulator to decrypt and run Switch games.
- title.keys – These are game-specific decryption keys that unlock individual game files.
Are These Keys Legal?
Technically, prod.keys and title.keys are copyrighted by Nintendo. You’re supposed to dump them from your own Switch console if you own one. However, many users download them from the internet since dumping them manually requires homebrew tools.
⚠️ Disclaimer: I don’t condone piracy. This guide assumes you own the games and are using the emulator for backup purposes.
Skyline Emulator System Requirements
Before installing, make sure your Android device meets these minimum requirements:
- OS: Android 10 or higher
- CPU: Snapdragon 660 or better (Exynos & MediaTek may have issues)
- RAM: 4GB+ (6GB+ recommended for smoother gameplay)
- Storage: At least 30MB for the emulator + space for games
If your phone has a weak GPU (like Mali or PowerVR), performance may suffer. Adreno GPUs (Snapdragon) work best.
Where to Download Prod.keys & Title.keys for Skyline
Since Skyline doesn’t include these keys by default, you’ll need to get them separately.
Option 1: Dump from Your Own Nintendo Switch (Legal Method)
If you have a modded Switch, you can extract the keys using tools like Lockpick_RCM.
Option 2: Download from Trusted Sources
Many users get pre-dumped keys from forums or GitHub. You can find them by searching:
- “Skyline prod.keys download”
- “Switch title.keys latest”
(Note: I can’t link directly to key files due to legal reasons, but a quick Google search should help.)
Once downloaded, you’ll usually get a .zip or .rar file containing:
prod.keystitle.keys
How to Install Prod.keys & Title.keys on Skyline Emulator
Now, let’s get these keys set up properly. Follow these steps carefully:
Step 1: Download & Extract the Keys
- Download the prod.keys & title.keys file (usually a .zip or .rar).
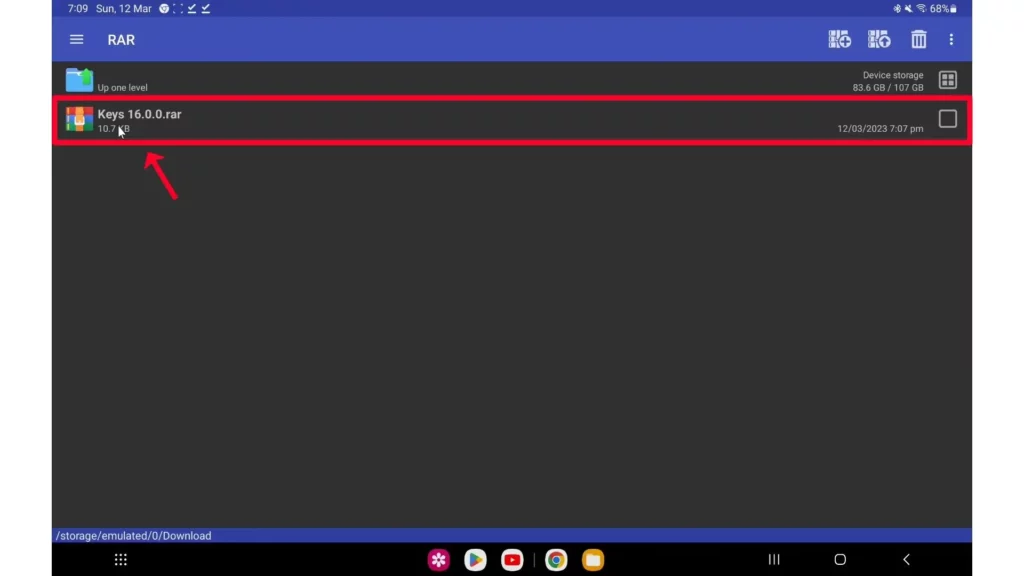
- Use ZArchiver (Android) or WinRAR (PC) to extract the files.
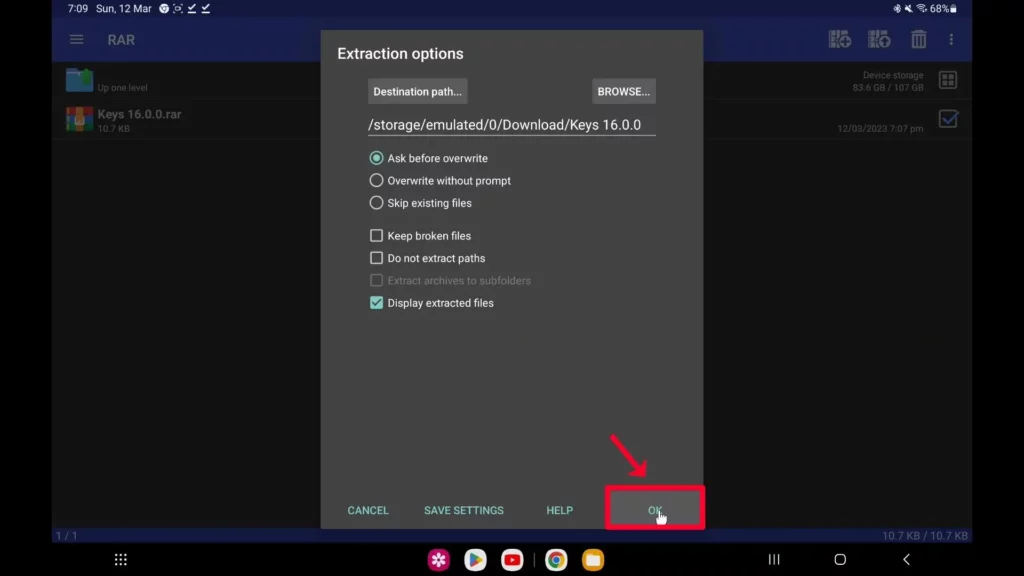
- Move the extracted
prod.keysandtitle.keysto a folder you can easily access (like /Downloads).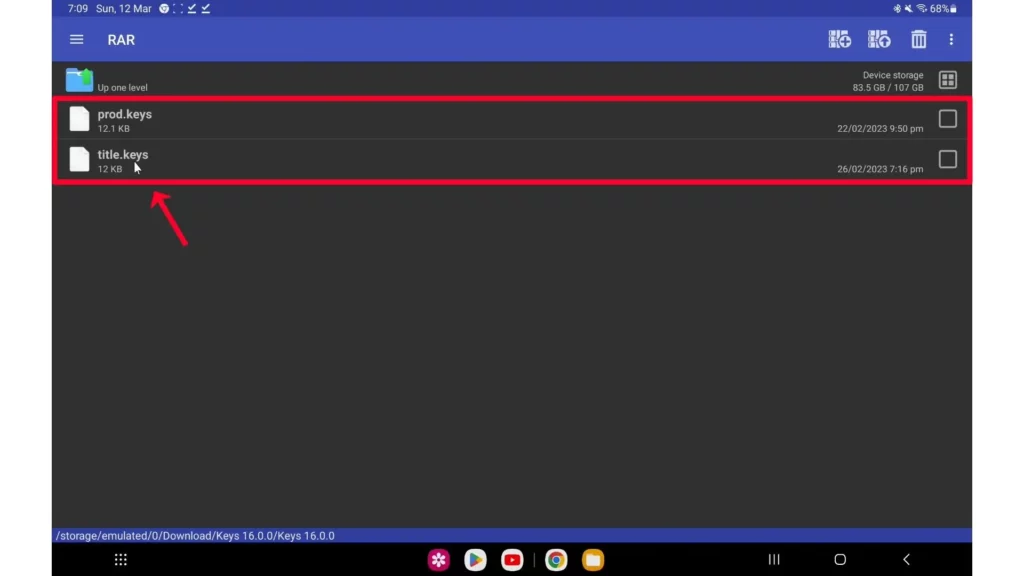
Step 2: Install Skyline Emulator
- Download the latest Skyline APK. The official website is no more available but you can search for the APK files online.
- Open the APK and install it (allow “Install Unknown Sources” if prompted).
Step 3: Load the Keys into Skyline
- Open Skyline Emulator.
- Tap the ☰ (Menu) icon → “Settings”.
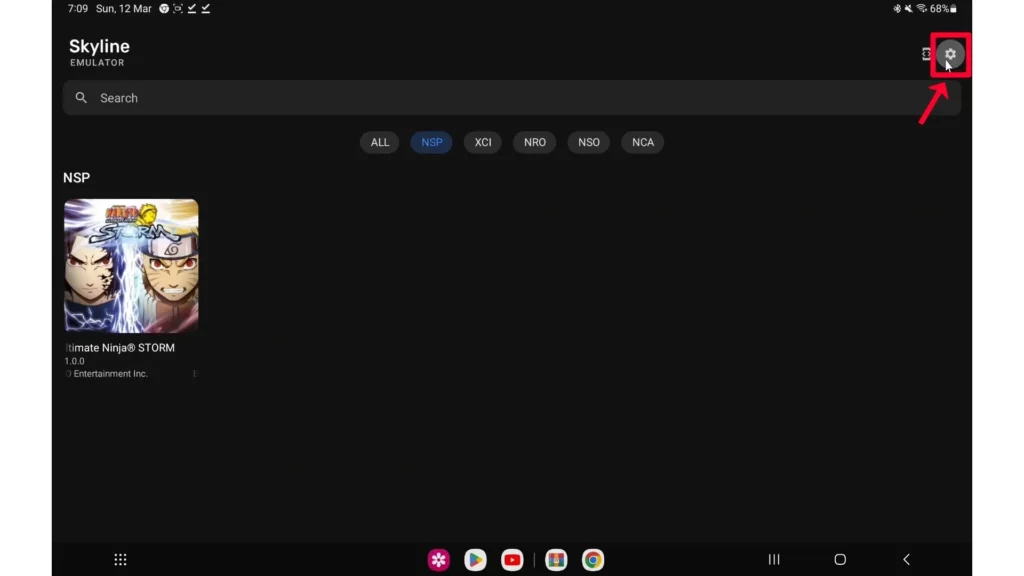
- Scroll down to “Keys”.
- Tap “Install Prod Keys” and select your
prod.keysfile.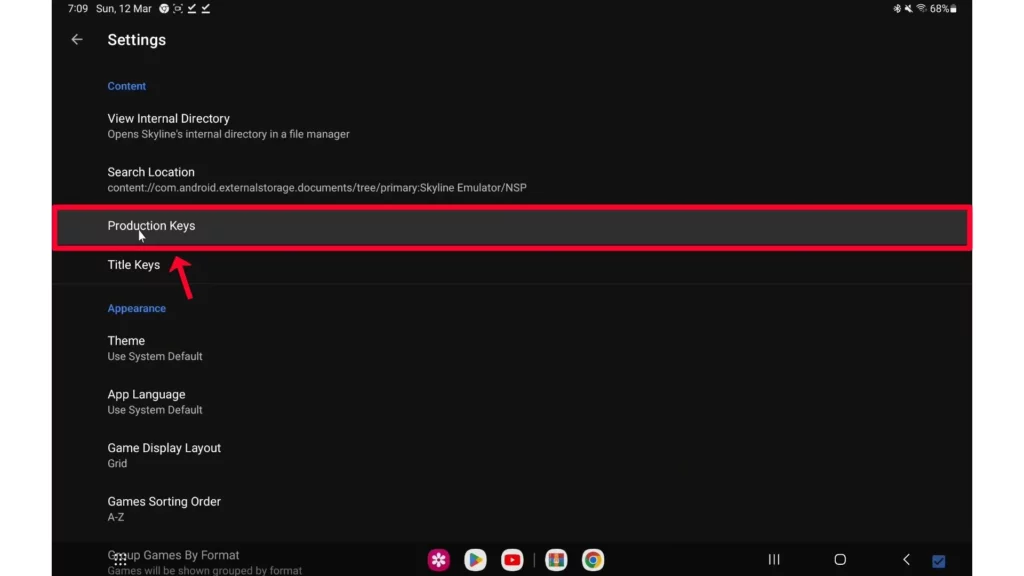
- Do the same for “Install Title Keys” and select
title.keys.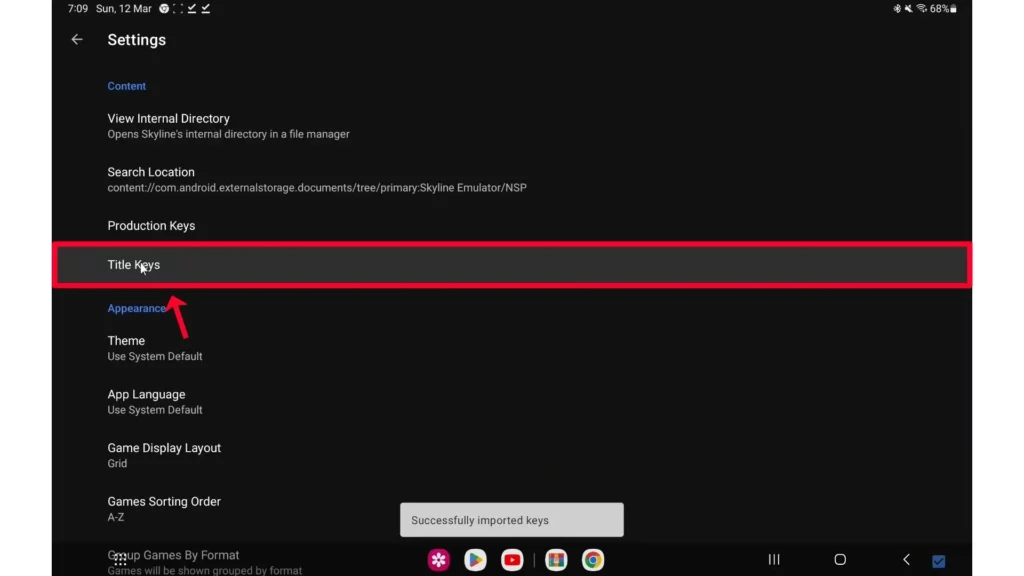
✅ Done! Skyline will now recognize Switch games.
How to Add Nintendo Switch Games to Skyline
Now that the keys are installed, you need game files (ROMs).
Step 1: Get Game ROMs (Legally)
- If you own the game, dump it from your Switch using tools like NXDumpTool.
- Otherwise, you’ll need to find ROMs online (Google is your friend).
Step 2: Transfer Games to Your Android Device
- Place your .NSP or .XCI game files in a folder (e.g.,
/Switch/Games). - Open Skyline, tap “Add Game Directory”, and select the folder.
- The games should appear in your library. Tap one to start playing!
Best Skyline Emulator Settings for Performance
To avoid lag, tweak these settings:
- GPU Driver: Use Turnip (Adreno) or Mesa (Mali) for better compatibility.
- CPU Mode: Set to “Max Performance” if games run slow.
- Resolution Scale: Lower it (e.g., 0.75x) for smoother FPS.
- VSync: Disable if you experience stuttering.
Troubleshooting Common Skyline Issues
❌ “Missing Keys” Error → Make sure prod.keys and title.keys are correctly installed.
❌ Game Crashes on Launch → The game may not be compatible yet. Check the Compatibility List.
❌ Low FPS → Try lowering resolution, using a better GPU driver, or closing background apps.
Skyline is an amazing emulator that brings Nintendo Switch gaming to Android, but it’s still evolving. Some games work flawlessly, while others may crash or run slowly.
If you follow this guide, you should have prod.keys & title.keys installed correctly, allowing you to play your favorite Switch titles on the go.
Got questions? Drop them in the comments below! 🚀